
Friday, December 26, 2014
Oh So Cozy
Monday, December 22, 2014
Baking Up Christmas

From The Silhouette Store
|

Friday, December 19, 2014
Believe Christmas Layout
Merry Christmas Everyone, Happy Holidays and Happy New Year!

File is from the Silhouette Store Believe by PPbNDesigns.com. The paper used is from Echo Park I had left over from the Merry Christmas line. I added some pearls on the Believe for something extra and inked my edges with Powder Puff chalking ink from Quick Quotes. Pretty simple and a very fast layout. Hope everyones holidays are happy and safe!
Thursday, December 18, 2014
Hey Diddle Diddle layout

Love how this layout came out. I used both the Cricut Explore and the Silhouette Cameo on this, yes they do play well together. Both machines have their place and I have found both machines have good features and things that can be improved upon. The Once upon a time title was cut with the Explore, the cutting was fantastic the only problem I found was I can't change the colors of the layers so I used my copics to change some of the colors in it. The cow is from Too Cute By Jessica because Nikki doesn't have a cow for the set yet and I was impatient. I made the photo frames by combining two rectangle shapes. The rest of the Hey Diddle Diddle pieces are from PPbNDesigns links to follow Hey Diddle Moon (cut on Cameo), Hey diddle dish and spoon (Explore), Hey diddle fiddle (Explore) and a Peachy Keen stamped face, Hey diddle cat (Explore) and all the other shapes were cut with the Cameo with shapes from the Silhouette store. I wrote the poem in the white space because I just couldn't leave it white. The little disks are perler beads melted and stuck on with Glossy accents.


 |
Place Perler bead on baking sheet with either a silicon mat or parchment paper standing up. Oven preheated to 400 degrees. Bake for 12 minutes turn off oven and allow beads to cool in oven.
|
 |
This is the pack I used
|

I found that the different types and colors melt differently. The pearlized ones in this pack took two times in the oven to close up and still looked funny. The stripped ones are so cute with the two colors. Try this just for fun if you have some Perler beads around. They do stink while cooking so beware.
Tuesday, December 16, 2014
PPBN Nativity Set
Hey beautiful crafters! Today I wanted to share with you a project I made using the adorable nativity set from PPBNdesigns. I made this for my mother in law. I hope she loves it.

After I made it husband said that maybe I could make the nativity scene a little larger. If I have time to get that done before Christmas I will be sure to post the picture so yall can see it. ;)
Hope you are having a joyous holiday season!
Hugs & Creative Blessings,
Raven
Monday, December 15, 2014
Merry Christmas printed layout.
Merry Christmas
OK, I wanted to give this a try to see if it would work. This is just printed no piecing. I used a bunch of different files Christmas Boy Elf, Christmas Girl Elf, Mrs Claus, Merry Christmas, Visiting Santa, Christmas Candy Tree and Boys and Their Toys. The paper is all digital. Hope you enjoy.
Christmas Candy Garland
Candy Garland
Christmas Candy file make a very cute garland for your tree or just to hang on your desk. I just cut and pieced each piece until I had enough to hang. I made mine double sided by mirror imagining and sticking back to back but this is not necessary.
Friday, December 12, 2014
Santa Owl Card

This is a card I made to send out. I printed the png. file and then sized the two green svg. file pieces to fit on my base to give it some depth. I added ultra fine Flower soft to the brim and ball of hat. Before I cut the base I offset the image because I wanted the white layer. To make it a card I cut this layer twice and placed a fold line on the back image. Simple card but came out cute. File I used was Santa Owl.
Monday, December 8, 2014
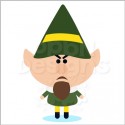
Angry Elf Card
Hey Everyone! Ken here with Ken's Kreations.
Well I am starting to feel back to normal after my gallbladder surgery, so now I can get back to my passion....CRAFTING!! Well my favorite time of the year is Christmas and one of my yearly traditions is to watch the movie "Elf". This movie was the inspiration behind this Christmas Card:

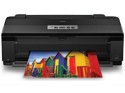
For this card I used the Cricut Explore. I started with the card base which I found on the Christmas Card Cartridge. I brought the card with the tree on it into deign space and ungrouped it. I deleted the tree so I just had the card base and sentiment rectangle left. I inked the edge of the top layer of the card with Bamboo Pigment Ink. In the center of the card I used the Angry Elf SVG file from PPBN Designs. I used the Print Then Cut feature in Design Space with my Cricut Explore and my Epson Artisan 1430. I raised the elf in the center of the card using Foam Tape. On each side of the elf I wanted to hang some ornaments and found the perfect border on the Holiday Cakes Cartridge. To add a little bling to the border I used my I-Rock Heat Setter and green/red gems. I could now turn my focus to the sentiment, which is one of my favorite quotes form the elf movie...." He's An Angry Elf"
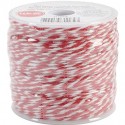
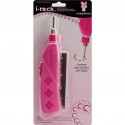
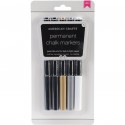
I used the font off the Holiday Frames & Tags Cartridge. I used the writing feature on the Cricut Explore. I used the American Crafts Chalk Markers on the dark red sentiment backing. Now these pens fit snugly in the circuit explore or you can use the Chomas Pen Holder for a better fit. Here is a video on the Chomas Pen Holder. On each end of the sentiment I wrapped Red Baker's Twine and finished it off with a basic red button.

I hoped you enjoyed this "Angry Elf Card". Make sure to check out the current Close To My Heart December specials and Don's forget to check out the shopping list below to make this card yourself. Any purchase made on the site will help support Ken's Kreations.
And don't forget.....I adore all of you!!!


 |  |  |  |  |
 |  |  |  |  |
 |  |  |  |
InLinkz.com
This post may contain affiliate links. If you purchase a product using the link I may receive a commission. I only participate in affiliate programs for products that I use or can recommend. Thanks for supporting Ken's Kreations
Sunday, December 7, 2014
O Christmas Tree

The files I use are car with Christmas tree, O Christmas Tree, North Pole Sign, and Colorful Christmas Tree. The paper I used was from BoBunny the Candy Cane Lane collection. This is two sided so I had plenty of choices. I choose to cut my paper in half and put back together from 1/2 of another sheet. I then choose a paper for the borders, The photo corners are from the Silhouette store. The 2014 is the Candy Cane font from the Silhouette store. Hope you are have a Blessed Christmas season. I bought the paper in OKC, OK at a cute shop called Paper Crown her web site is www.papercrown.net.
Tuesday, December 2, 2014
Snowmen
Hey beautiful crafters! I have a thing for snowmen! I have no idea why...it probably steams from Christmas. The idea of Christmas movies and Frosty the Snowman proclaiming, "HAPPY BIRTHDAY" brings a smile to my face that I can't even begin to describe. Hence the reason you will be seeing snowmen for oh say another month or so. ;)

So without further ado my current favorite snowman is this cutie file from PPBNdesigns.

I kept the same color theme except for his base I used a Christmas pattern paper you can tell if you look closely at the arms. I super love him!!!
Hope you are all having a joyous December!
Hugs & Creative Blessings,
Raven
Monday, December 1, 2014
Birthday Bash

Birthday Bash file at ppbndesigns.com or 
Design ID #48471
9/12/2013 at the Silhouette Store
I know most people are doing Christmas layouts but my daughter was born Dec. 24th so I need a birthday layout for her. I used her favorite colors and had some fun with this layout. Picture doesn't show the glitter. Hope everyone enjoys this layout, I had fun making it.
Subscribe to:
Comments (Atom)