Tuesday, September 2, 2014

Puppet Theatre

Hey beautiful crafters! Sooooo the kiddos and I went on a walk yesterday and found this super cute puppet theatre. Of course I had to make the girls something fun to play with it. NOW they want ALL of the member exclusives so I'll be sure to post a picture when we make more. ;)


Elmo blends in a little but I'm not sure how to change the color of the curtains without taking the entire thing apart. ;) 

Thanks everyone so much for stopping by!

This post has been brought to you by the colors Blue and Red as well as by the 
Letters M O N S T E R! 


Monday, September 1, 2014

Nail Decals

Well it is Monday morning again and I have a cute idea to dress up your nails. Choose any of the PPbN files that have a simple shape and turn them into a nail decal. This bat is from Harvest Moon file. I choose to make different sizes to see what would work best on each nail. I know that the largest I can go is 1/2 inch and the smallest most things will cut well is 1/4 inch so I try to stay in those sizes. The bats cut really well and were easy to weed.        

 The footballs were from the Super Bowl Sunday file, but there are several other places to find a football. After cutting vinyl and weeding the design I use a set of sharp tweezers to put on my nails and then I use a clear coat of polish over the nail. These stay on really well and I usually have to pick them off when I an done with the design.

Friday, August 29, 2014

Visiting Santa

I decided to have this go live on Friday since it is a long weekend, hope everyone has a safe holiday.
Good morning everone. I know Christmas is months away but I wanted to try some new techniques that this page was great for. If you would like to find out how I added stitch lines to the letters and how I set up the print and cut go to my blog Craft Place. I used glitter, velvet cardstock, flower soft, glossy accents and foam dots to add texture and dimension to this layout. Hope you enjoy.

Thursday, August 28, 2014

FLOWERY THANK YOU

Hey Everyone. Ken here with another Ken's Kreations. Well I recently was given a generous gift from a friend and I have been gathering some goodies for her and I also wanted to make her a thank you card to go along with those goodies. Recently I have fallen in love with the CRICUT ART PHILOSOPHY CARTRIDGE which is perfect for card making, so I knew I wanted to make a card using this cartridge. Just an FYI, all of the supplies that I used for this card can be found at the end of the post or by clicking any of the links in the post. So this is where I started. 

I knew I wanted a simple, yet elegant card. Using my CRICUT EXPLORE machine, the CRICUT ART PHILOSOPHY CARTRIDGE and this  PPBN SVG FILE I came up with this simple but elegant  thank you card:

I started with the card base off of the CRICUT ART PHILOSOPHY CARTRIDGE. This cartridge is an exclusive cartridge from Close to My heart which you can purchase through me by clicking the link below. It is amazing for card makers since it features so many card bases and embellishments. I sized the card at 4X6 on DARCIE EMBELLISH PAPER. For this card base you will need the SCORE TOOL to score the center part of the card.
To make these flowers I decided to use a SVG file from PPBN DESIGNS called 4 LAYERED FLOWERS. I used pattern paper I found in my stash in bright colors to compliment the dark color toned from the base card. I used CTMH 3D FOAM TAPE to raise up the layers of the flowers in between each layer.
Here is a closer look at the  CTMH 3D FOAM TAPE to show the layers.
Using the same CRICUT ART PHILOSOPHY CARTRIDGE I found a tag on the cartridge that matched the theme I was going for. One of the new features I love about the CRICUT EXPLORE is the ability to import our own fonts, which this one is from DAFONT.COM and is called tiny treasure.  I simply wrote thanks and using the attached feature in DESIGN SPACE I was able to write on BLACK CARD STOCK using my white V5 pen. For the "A Bunch" I took a "arrow" from the DIMENSION ELEMENTS SIGNAGE COLLECTION and inked the edges with HONEYSUCKLE CTMH INK and raised it up using my CTMH 3D FOAM TAPE.

I just loved how this card turned out and I hope that my friend loves it too. I know that I adore the gift she gave me and I cannot wait to give this to her with her goodie bag!! Thanks for taking a look at today's Kreation! If you have never heard about CRICUT ART PHILOSOPHY CARTRIDGE here is a video going over this amazing cartridge and you can buy it below:


Wednesday, August 27, 2014

No Tricks Just Treats!!!

It's getting that time of year when you see all the decorations coming out for Halloween and time to go ahead and prepare those pages for all the great pictures of the little ones on Halloween.  Diane here today with my last design team post.  I have enjoyed bringing you weekly inspiration of all PPBN Designs svg files.  I may not be posting weekly to the blog, but will still be sharing all these great files so stop by my blog and check them out.  For this layout I used the Trick or Treat scrapbook kit.  I love this one and was so fun and easy to put together.  I used my Cricut Explore.  The pattern papers were scraps and cardstock was from Bazzill.  Check out these and all the other great files from PPBN Designs.

Tuesday, August 26, 2014

Doll Patterns

Hi beautiful crafters! I hope you are all doing fabulous!

So, I was looking over the files at PPbNdesigns and decided... wouldn't they be super cute as dolls? Yeah! I have two girlies who love dolls. My older daughter had a tonsillectomy the beginning of 2013 and they gave her a doll at the hospital. So, now she is on a mission to make dolls to give to the kiddos who go through surgery! Love that idea, so I'm helping her out a little.

Here is one of my recent dolls after washing.

Hope you all enjoy!


The file I used is the Kansas Girl file. I then stamped her face with StazOn ink and the Super Simple Eyes and Noses Set. 

Because I didn't want her face to come off after being played with a lot I went ahead and stitched it with black thread.


That's it for today! I hope you all enjoyed and I'd love to see your projects so please tag me when you post them online. ;)

Hugs and Creative Blessings,
Raven

Monday, August 25, 2014

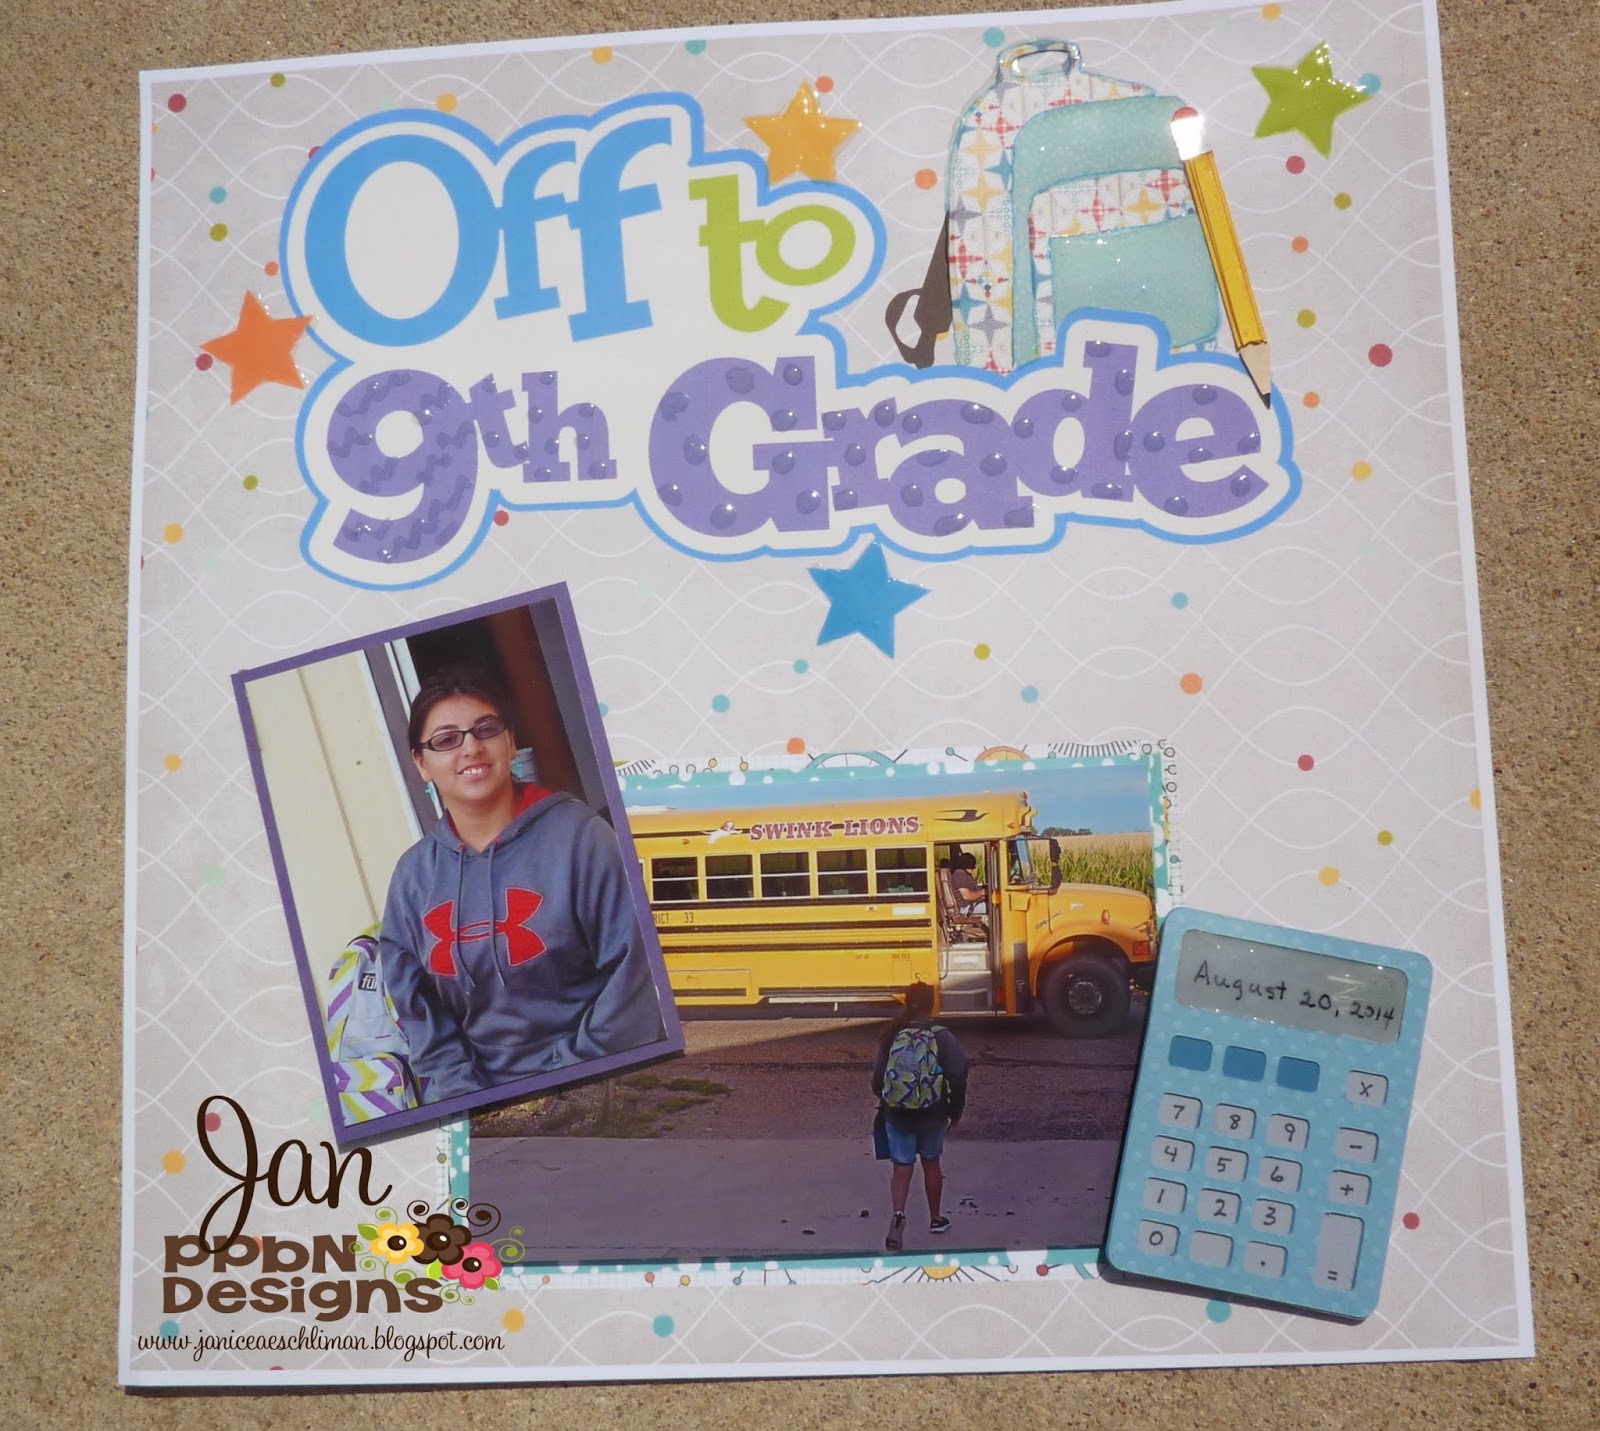
Off to 9th Grade


Hello, it is Janice from Craft Place here with a new layout from PPbN Designs. School started last week so I did this layout for my daughter. This is my youngest child's first day in high school. The file I used is Off to 9th Grade and the calculator is from Off to 7th Grade.
Finished layout
This is the printed page I set up in DE of my Silhouette software. I choose digital paper for each piece and set my page up to print. I had no cut lines so I could print the whole page and not worry about having the registration marks. I printed on my Epson wf-7520. To add some dimension to the page I used Glossy accents on the backpack front, stars and added dots on the letters. To finish my page I added the photos and the pieced pencil and calculator (which I added some Glossy accents to as well). Hope you enjoy and have a fantastic week.