
Wednesday, July 30, 2014
Just Two Peas in a Pod
Welcome to another project here at PPBN Designs Blog. Diane here sharing this two page layout. This layout called Peas in a Pod is perfect for the two little peas in my life, my granddaughters. Well life got in the way for me this week with a death in the family and because I had to go out of state, the pictures never got on this layout. I know it is perfect for the girls scrapbooks. This is the cutest layout and you can purchase the entire layout set, or like I did , use the Peas title, Peas border, the peapod, and 2 Peas. Stop by PPBN Designs and check out all the great svg files. On the side bar in the blog, click and join the monthly club for lots of benefits! See you next week with another project.
Monday, July 28, 2014
Boys and Their Toys!


Sunday, July 27, 2014
"There's no place like home"
Hello Everyone! Today I wanted to share this card with everyone. I love the Wizard of Oz and I really love this super cute file from PPbN designs :) I created the yellow brick road by using an embossing folder that I inked first with an ink pad to achieve the "grout lines". I also used my Cricut Explore to write the sentiment on the outside of the card. To finish everything off I used glitter cardstock to create her "Ruby Slippers" I just love this card and I hope you do to!
.jpeg)

Thursday, July 24, 2014
DIY COLORING PAGES FOR YOUR CRICUT EXPLORE
Hey Everyone! Ken here with another Ken's Kreations! So I always have little kiddos wanting to come play in my craft room with me, and i just adore having them. Sometimes I am on a time crunch and need to have something to occupy their time while I am finishing my project. Well I found something that my CRICUT EXPLORE does just amazingly!!
In this video I show you how you can create these custom DIY coloring pages using your CRICUT EXPLORE and CRAYOLA FINE TIP MARKERS. You can use either Cricut Library images or SVG files. For this project I used PPBN MEMBER ONLY EXCLUSIVE SET. However I highly recommend using Cricut Library Images which are already layered and make this process very easy! The best way to get access to over 25,000 images is to subscribe to their CRICUT SUBSCRIPTION PLAN INFORMATION. Here is some examples of the coloring sheets I made and then I have made a youtube video on how you can make your own!!
Here is A Step-By-Step video on how to make your own Coloring Pages using your CRICUT EXPLORE and CRAYOLA FINE TIP MARKERS. Below that you will see all the images I made to show you how they turned out!


SUPPLY LIST FOR THIS PROJECT:
Machine: CRICUT EXPLORE
Markers: CRAYOLA FINE TIP MARKERS
Paper: 110# PAPER
This post may contain affiliate links. If you purchase a product using the link I may receive a commission. I only participate in affiliate programs for products that I use and I only receive a small percentage back which goes back into my videos and blogs for my followers.
Wednesday, July 23, 2014
Sharing a couple new designs with you today!!!
Welcome! Diane here sharing with you today and I have created a couple projects with some of the new svg files. The first one is a quick and easy shaped Birthday Girl card. I loved how easy this was to cut and put together. I used my Silhouette Cameo and just cardstock and added a little stickles.
 My second project for today is a scrapbook page I created with a new file called Off to Kindergarten and used some elements from one of the older files called First Day of Preschool. For this layout I used paper from a Me and My Big Ideas school stack, Michaels cardstock and added some ribbon. My little granddaughter will be going to kindergarten in about 3 weeks so I am ready for that first picture. I used my Silhouette Cameo for this one too. I did receive my Cricut Explore today so I will be working on learning it and creating on both!!! Love my toys! Stop over to PPBN Designs and check out all the great files for the crafter on a budget! Take a look at the fantastic club too!

Tuesday, July 22, 2014
Using Vinyl...
Hey beautiful crafters!!!
I can't even begin to tell you how much I love PPbNdesigns. I'm not saying that because I'm a designer. I'm saying that because I'm a full time mamma to 3 beautiful babies still at home (1 grown). A full time employee for a phenomenal company AND a less than part-time crafter! But crafting brings me so much peace and I have to be honest and tell you I'm an "instant gratification crafty girl"! I'm not ashamed to admit it. So let me show you this adorable project that I made within 10 minutes!
So, this is what happened...
I was on the Facebook page for PPbNdesigns and came across a question by Manda, "I bought a ppbn design. Is it possible to cut this in vinyl? Or do they just work better in paper? I'd LOVE to do it in vinyl."
Oh my goodness. What a great question! YES, you can cut them in vinyl and they come out FABULOUSLY!!!
If you are using a Cameo I advise turning your blade all the way down to 1 to start off. If your blade is still within usable condition it should cut through the vinyl and not the paper backing on the vinyl. I choose to use a simpler file because I'm in love with this Girl Mouse Ears file and I hadn't used it yet.
Because of her post and question I ran to Michael's to check the clearance section. Low and behold one tumbler was there for .39 YAYYY. One piece was broken off so I trashed that piece and ended up with this...

Cute right?!?!?!
I kept watching the PPbN Facebook page and saw that Manda also posted a WONDERFUL project made with vinyl!!!

Wowzers!!! She used white, she advised doubling up when you use white or choosing a different color. ;)
One last piece of advice hand wash these little gems and do NOT put them in the dishwasher. ;) Sadly, I speak from experience.
Thank you all so much for stopping by!
Hugs and Crafty Blessings,
Raven & our PPbN guest Manda
Thanks Manda for letting us feature your project today!
Thanks Manda for letting us feature your project today!
Monday, July 21, 2014
You're a Hoot! PPbN Designs layout file
Hello everyone, Janice here from Craft Place to show you how I plan a layout and sometimes decide to change things. I always take a picture before I glue down my pieces to see if I like how I have things laid out.
I decided I needed a moon behind the owl so I went into my Silhouette Design Studio and I just made a circle and pulled it off the page a little bit and cut.


I put pop dots behind the owl and some of the flowers to give added dimension to my page.

I added some accents to my words and some of the flowers to make them pop a little.

You can find the file You're a Hoot here
Materials used:
You're a Hoot file
2 base papers
2 pinks
3 browns
2 yellow/orange
1 turquoise
3 greens
Scotch tape runner
Scotch Quick-Dry Adhesive
pop dots
White Signo pen
Sunday, July 20, 2014
Summer Wreath
Hello Everyone! My Mom asked if I would create a new wreath for her front door and of course I said yes!! I used a standard straw wreath as the base and used the PPbN flowers file to create all of the flowers. I love this wreath and I cannot wait to make some others for the upcoming holidays!

Thursday, July 17, 2014
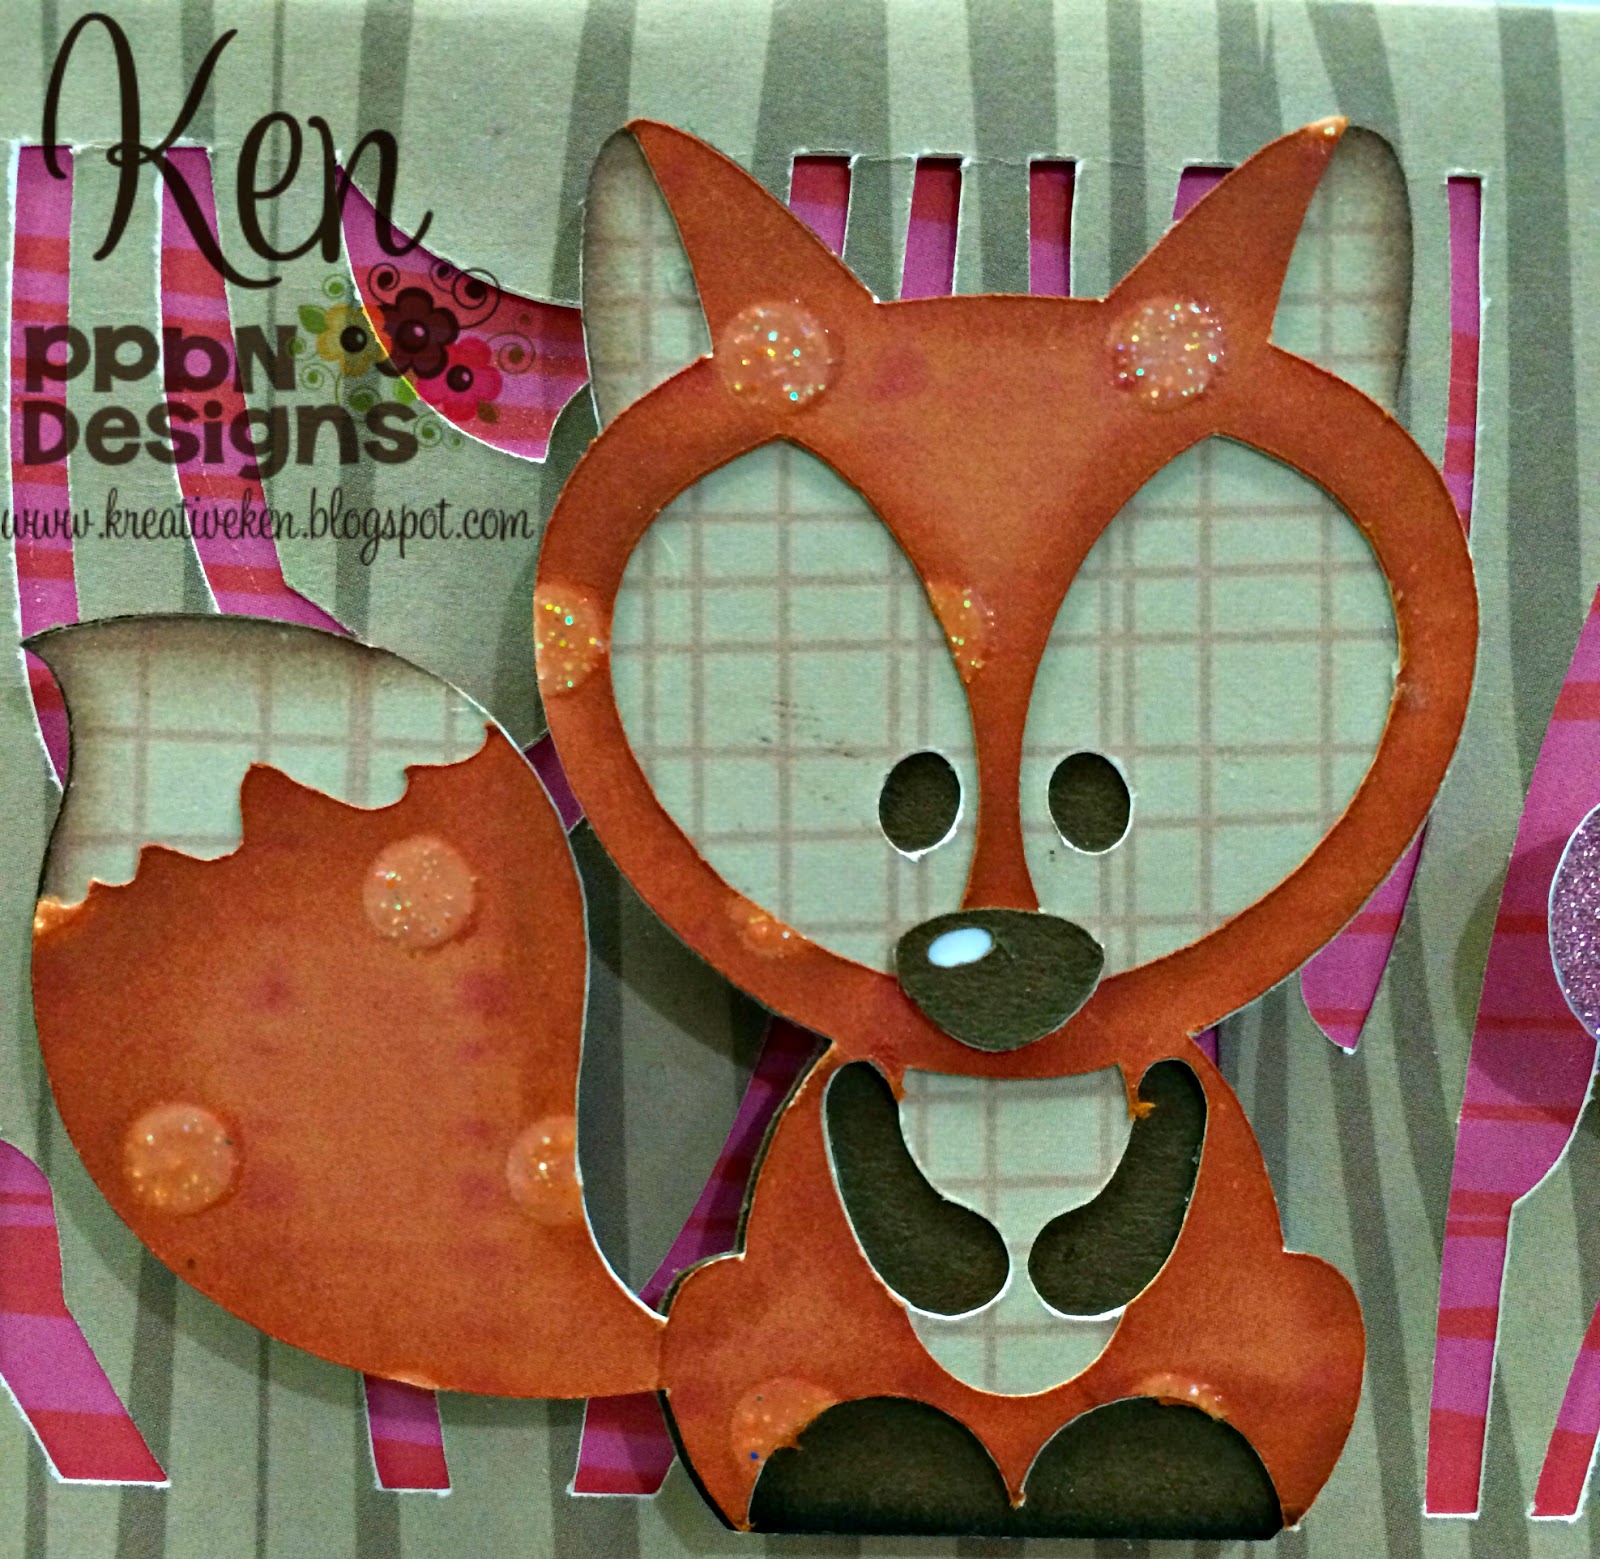
YOU'RE A FOX
Hey Everyone! Ken here with Ken's Kreations. I just love how easy it is to create cards in Design Space using my Cricut Explore. I wanted to show you a project I created with my Cricut Explore and one of my favorite PPBN Design files. You can find all the links to all of the supplies and website below the video to this project. Just a little FYI....the Cricut Explore in the supply list below is only 269.99 for the amazing bundle which comes with the machine, three mats and the tool set!!
I had to make one last thank you card at my work so this time I wanted to make a video showing you peeps just how I did it. In this video I will show you the entire process from start to finish. I will show you the product I used, the design phase, and the construction phase.
Here is the finish result! I hope you enjoyed the video and I hope your card turned out just as FOXY!! For a complete list of supplies and the links to get them head to the bottom of the page and follow the links!!
Thanks for taking a look at today's Kreation. Come back tomorrow to see what Kreation I come up with next!


SUPPLY LIST
LINKS WILL TAKE YOU TO PRODUCT PAGE
MACHINES: CRICUT EXPLORE BUNDLE
OTHER: RIC RAK, PINK BUTTONS
ADHESIVE: 3D CIRCLE FOAM DOTS, SCOTCH ATG
DESIGNS: PPBN FOX, SIMPLE CARDS
**For the card base you can either buy the SIMPLE CARDS OR a much better option is to sign up for the subscription service like I did in the video which will unlock 25,000 + images**
CLICK HERE TO GET SUBSCRIPTION FOR ONLY 9.99 AND UNLOCK 25,000 + IMAGES
CLICK HERE TO GET SUBSCRIPTION FOR ONLY 9.99 AND UNLOCK 25,000 + IMAGES
Wednesday, July 16, 2014
Time for Some Magnet Fun!
Welcome to the Wednesday project here at PPBN Designs blog. Diane here today sharing the little ponies svg files. My little granddaughter loves playing with magnets on her board or the refrigerator so I turned her favorite characters right now into magnets. I used the Pink Pony, Purple Sparkle, Butterfly Pony, Rainbow Pony, and Rare Pony. She will be so surprised when I pick her up today!!! These are so cute and easy to do. I just cut them with cardstock , added stickles to glam them up and placed a magnet on the back. We love sparkles!!! Be sure to check out these and all the other great files at PPBN Designs. Be sure to check out the fabulous membership deal too! Do you like free??? Well, how about 60 free images a month!!! Look on the sidebar for details or stop by PPBN Designs.


Tuesday, July 15, 2014
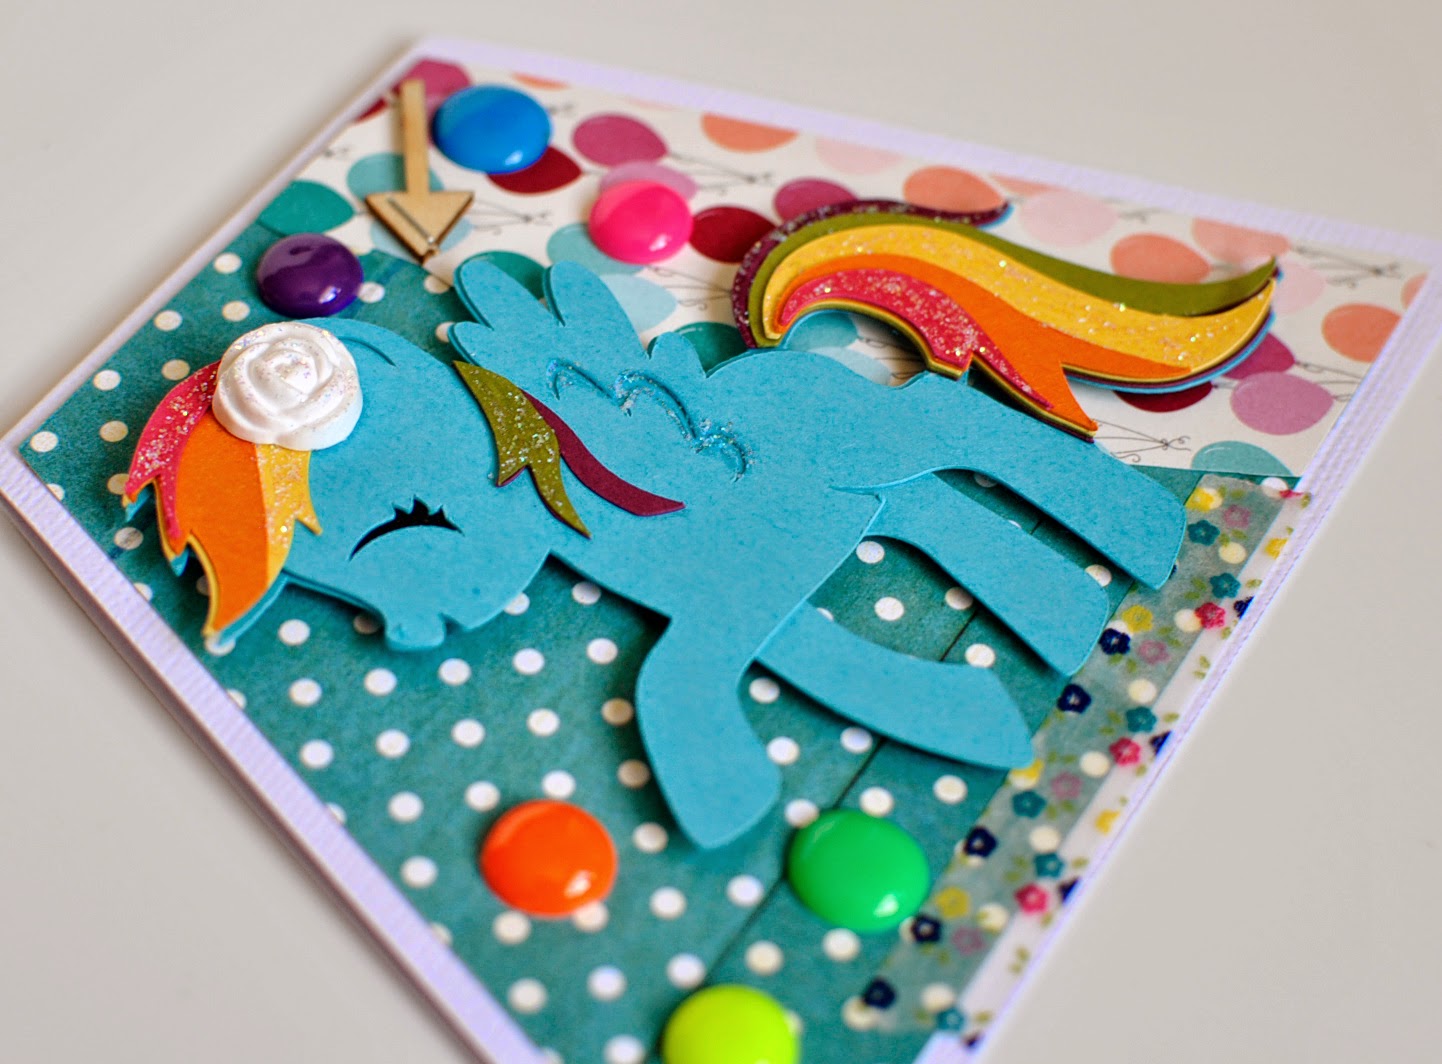
Rainbowwwwwww!
Hi beautiful crafters! Another week another fun project for PPBN Designs! Did y'all see that there are currently some really fun membership options HERE!
And if you haven't seen them yet Nikki came out with some adorable Pony cuts. I LOVE them and my girlies love them as well. Since I love color and rainbows I decided to turn the cutie pie
Rainbow Pony
into a fun card!

One of the beautiful crafters, Deborah, posted a super cute project using glitter paper for her daughter and that inspired the stickle glitter on this pony. You can check out her amazing project HERE! Isn't her project FABULOUS! Yeah, I lub it too!

I wanted to be sure y'all could see the tail. All of the pieces Nikki makes are so wonderful because they are so easy to put together. These just layer right on top of each other. LOVE the simplicity of them.

Those three little beads up at the top right are actually Pony beads that sis and I melted to make into "pearl" looking gems.
And now for an added bonus!!!
I can't very well craft without my littles crafting right along with me. Which is BY FAR the best way to spend my crafty time. When I was looking through which file I wanted to use my baby girl Aubrey (8) asked if she could please make a card as well! Of course, and because she asked so sweetly I let her pick out which file we would use. Here is her amazing project! She inspired a LOT of my design. I love when the littles can do that!
Isn't it just beautiful? She likes color about just as much as her mom! And look at how well she put together this file! Yup, they are little hand friendly cut files!!!

Thank you beautiful crafters for taking the time to read over this "wordy" post. I hope we have inspired you in some way. May you have a wonderful week!!!
Hugs and creative blessings,
Raven & Aubrey
Monday, July 14, 2014
Zoo Layout
Happy Monday!

Our zoo is on a mountain side and the view is so gorgeous but today I am only going to show you the giraffe enclosure. This is so different because we fed the giraffes lettuce and you could pet them, take your picture with them and even have them lick you. For this layout I used the Through Thick and thin file. I inked my edges with powder puff chalking ink.

For the eyes I used a uni ball Signo white pen for the white areas, the blue accent is a colored pencil. For the lashes I used a black colored pencil to draw a black line around part of the eye and smudged it with a paper nib and odorless mineral spirits (both can be found at Michael's) and the the lashes are drawn on with a .05 black marker.( I use Prismcolor brand).

This title was made using fonts from my computer and a mountain from the Silhouette store.

Sunday, July 13, 2014
Happy Birthday!
Hello Everyone! First I would like to introduce myself. My name is Christopher Alan and I am the designer and creator of Christopher Alan Designs. I create YouTube tutorials and designs for die-cutting machines. I am super excited to be a Design Team Member for PPBN Designs! This card was actually created for my sister's fiance. She wanted a super fun card for her future gaming husband :) I used some fun papers and my Cuddlebug machine to achieve the background! I love this image set as it includes multiple images not just the game controller I have shown below :)
.jpeg)
Have an amazing day!

Wednesday, July 9, 2014
YOU'RE SO SWEET
Hey Everyone! Ken here with Ken's Kreation's. So I know I do not talk a lot about my personal life, but I had to share why I am making all of these thank you cards. You see I am a Bank Manager for an amazing bank called Washington Trust Bank. Due to circumstances out of my control I lost three of my staff in one month!! Sad story I know....please wipe away those tears. So I have a wonderful team of managers who have been sending me help from their teams to help me out and I just have to make them some Ken's Kreation's to thank them.

So for this card I used one of PPBN's amazing designs. This file is called 4th of July Cupcake and was just released for 4th of July. I just loved it and I though it would be perfect for a thank you card. I used Close To My Heart Art Philosophy for the 3 flags/banners on the left of the card. I used my CRICUT EXPLORE to cut all of the elements of this card. I absolutely love using my CRICUT EXPLORE and design space to visually create the entire card before cutting it out. For the frame behind the cupcake of the card I also used the Close To My Heart Art Philosophy.

I used the 4th of July Cupcake from PPBN Designs for the file. I used the cherry from Sweet Treats Cartridge. This is from the sundae and I had to use the count our option to hide certain parts of the sprinkles that I did not want. I than duplicate the cherry 6 times. I used Dewdrop Ink to ink my edges on the cherries on the cupcakes while using Daubers to apply the ink. For the top of the cupcake I used Red Pearl Pens for the outlines of the top of the cupcake. for the sparkle on the white part of the cupcake and the dot on the top cherry of the cupcake I used Crystal Stickles Glue. For the six cherries behind the cupcake I used White Pearl Pen for the white dot. I raised the cupcake up using 3D Foam Dots.

For the sentiment I used the Close To My Heart Art Philosophy for the 3 flag banners. I used the writing feature in Design space and my CRICUT EXPLORE. I love this feature and the Cricut Pen Set is amazing and as you can see makes amazing results. I used the writing feature to not only write the words but also to write the inner banner that you can see bordering the sentiments on the inside of the banner. For the outside of each of the flags I used Red Pearl Pens, Light Blue Pearl Pens and Bisque Liquid Pearl for the outside of the each of the flags and used 3D Foam Dots to raise the flags.
I just love how this card turned out and love the fact that I have such wonderful people in my life who have helped me out and given me a reason to make these amazing thank you cards. Thanks for coming by today to see my Kreation and come back tomorrow to see what other things I Kreate.
SUPPLY LIST
**CLICK THE LINK TO BE TAKEN TO THE SITE**
Machine: CRICUT EXPLORE
Cartridges: Sweet Treats Cartridge, Close To My Heart Art Philosophy
Adhesive: ATG Gun, 3D Foam Dots
Pens: Cricut Pen Set
Ink: Dewdrop Ink, Daubers
Sweet As Honey
Hello everyone! Diane here today from www.happyscrapperdiane.blogspot.com with a two page layout created with the adorable files from PPBN Designs. I used the Sweet as Honey title, Honey Bee on Flower, Cute Single Honey Bee, and Cute Flying Bumble Bee files. These are so cute and easy to work with. I have a perfect page for my cute granddaughters pictures. I used cardstock and added some stickles to the flowers. I am really pleased how it turned out. Be sure to check out all the great files and have you joined the club yet? For only $7 a month you get 60 free images a month and 40% off all your purchases so no reason not to try it out!!!!

Tuesday, July 8, 2014
The Doctor is IN...kinda
Hey beautiful crafters!
I'm so happy you stopped by today. I created a cutie pie little doc mcstuffins for my niece using PPBN designs file Toy Doctor. I LOVE this file but I left a few pieces out. My niece who is in love with this little cutie doesnt wear shoes EVER. She takes them off anywhere she goes, so I decided to make the legs look like leggings. Also, I made this cut really small to fit on a bookmark because she just started reading and so I left some of the smaller pieces off. I hope you all enjoy it and that you are enjoying a good book this summer!!! ;)

Hugs and creative Blessings,
Raven
Monday, July 7, 2014
The Doc is In
Good morning this is my Monday post for ppbndesigns.com. The file can be found here. The white flower border can be found in the Silhouette Store. I had to size and weld the border but all the rest of the pieces are cut at the size they appeared on the mat. This layout worked great for my grand daughter's visit to the doctor.

I used my Silhouette
2 sheets pink gingham paper
1 pink striped
1 reverse of the first gingham paper
1 sheet white paper
2 different purple
2 different pink
1 tan
1 turquoise
1 light brown
1 darker brown
Scotch glue
Scotch tape runner
1 ready made tag with reg and pink twine.
|

|

Subscribe to:
Posts (Atom)